How to Build a High-Converting Quiz for HTML
Learn how to build a high-converting quiz for HTML from scratch. This guide covers planning, coding with JS, and capturing valuable lead data.
Building a quiz with your own HTML is more than just a clever way to make a lead magnet; it's about taking back control. You get to dictate the design, own the data, and craft the entire user experience from the ground up. This turns a simple piece of content into a seriously powerful engine for generating qualified leads and gathering customer insights you can actually use.
Why a Custom HTML Quiz Is Your Best Bet for a Lead Magnet
Before you even think about writing a line of code, understand that a custom-built quiz isn't just another PDF or ebook. Those are one-way streets—you give them content, they give you an email. An interactive quiz, on the other hand, gives the user immediate, personalised value. It’s a conversation, and a far more memorable first impression.
The real magic is its ability to capture zero-party data. This is valuable information that customers willingly hand over. A standard form gets you a name and an email, maybe a company name. A quiz can uncover their needs, their preferences, and their specific challenges.
Segment Your Audience on Autopilot
Think of a well-built quiz as an automated sorting hat for your leads. By mapping answers to specific scores or outcomes, you can instantly categorise new leads into buckets you’ve already defined.
Imagine you're a marketing agency. Your quiz could segment leads into practical groups:
- Beginners: They need foundational content, such as 101 guides.
- Intermediates: They're looking for specific strategies and tools to get better results.
- Advanced Users: These individuals are ready for expert-level consultation and customised solutions.
This lets you follow up with laser-like precision. No more generic newsletter blasts that treat everyone the same. You can send content that speaks directly to each person's problems. That’s a massive step up.
Pave the Way for Personalised Journeys
A custom HTML quiz isn't just a form; it's the starting line for a personalised customer journey. The data you gather unlocks the ability to create incredibly relevant follow-up sequences.
If a user’s results show they're struggling with social media marketing, your email automation can kick in with case studies, tips, and service offers all focused on that one pain point.
A quiz turns lead generation from a transaction into a consultation. You diagnose a prospect's problem and immediately offer a tailored solution. This builds trust and authority before a sales call ever happens.
This level of personalisation directly impacts your conversion rates. When prospects feel understood, they’re far more likely to stick around and see what else you have to offer. For any business struggling with the quality of their inbound leads, a custom quiz can be a total game-changer.
If you're not sure how your current lead magnets are stacking up, running a quick audit can be eye-opening. A tool like Magnethive can generate a free, comprehensive report with three AI-powered lead magnet ideas, analyze your current assets, and show potential ROI impact. It’s a great way to spot weaknesses and find opportunities to build something more engaging—like a custom quiz.
Blueprint for a Successful Lead Generation Quiz
Before you write a single line of code, you need a plan.
Jumping straight into HTML and JavaScript without a clear strategy is a classic mistake. It’s like trying to build a house without a blueprint—you might end up with something that stands, but it won't deliver the results you need. The quizzes that actually pull in qualified leads are the ones that are carefully engineered from the ground up.
First, decide on one primary objective. What's the single most important thing this quiz needs to do? Are you trying to segment your email list for more targeted campaigns? Is the main goal to qualify sales leads by figuring out their budget and timeline? Or are you simply trying to educate potential customers about a complex service in an engaging way?
Choosing one core objective is critical. A quiz that tries to do everything at once will accomplish nothing. A focused goal dictates the questions you ask, the logic you build, and the call-to-action on the results page.
This flow shows how a simple quiz can be an incredibly powerful tool, guiding a user from being a casual browser to a fully qualified lead.
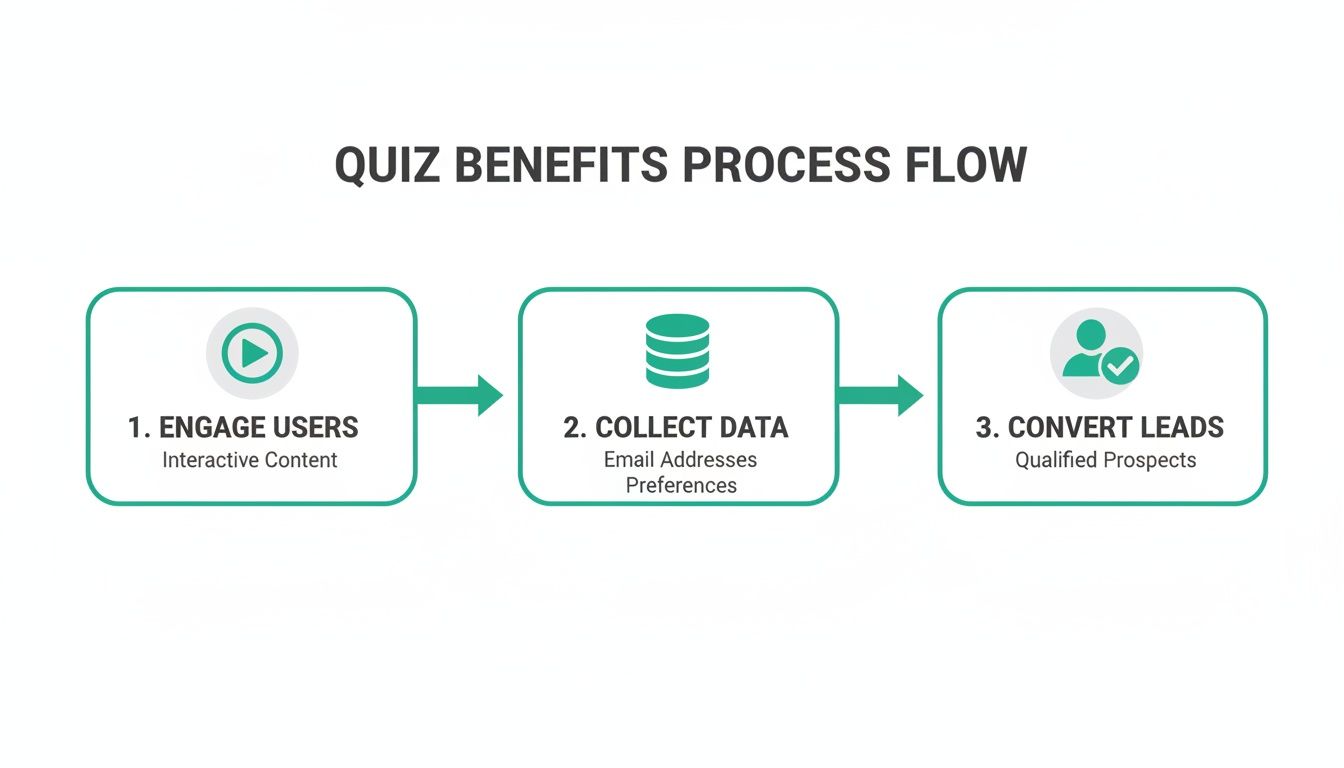
As you can see, it's a full-funnel machine, seamlessly moving someone from passive interest to becoming an active, well-understood prospect.
Mapping the User Flow and Core Components
Once your objective is locked in, you can start mapping out the user’s journey. This isn’t just about listing questions; it's about designing an experience that keeps people clicking. A high-converting quiz usually follows a few key stages, each with its own job to do.
Every single screen needs to pull its weight and contribute to that final goal. If you want to go deeper on the strategy side of things, our guide on how to make an online quiz breaks down the essential elements for getting maximum engagement.
These are the non-negotiable components that form the backbone of any lead-gen quiz built with HTML.
Here's a quick breakdown of the essential structural parts you'll need and what each one is responsible for.
| Core Components of a High-Converting HTML Quiz | ||
|---|---|---|
| Component | Purpose | Key Consideration |
| Welcome Screen | Your hook. It grabs attention and makes a clear promise about the value the user will get. | The headline is everything. It must create curiosity and set clear expectations. |
| Question Series | The heart of the quiz. This is where you collect the valuable zero-party data. | Keep it conversational and focus on the user's pain points, not your features. |
| Lead Capture Form | The gate to the results. This is the moment of conversion from visitor to lead. | Be transparent. Explain why you need their email ("Get your personalised results"). |
| Results Page | The payoff. Delivers on the promise and provides a personalised, valuable outcome. | Must feel customised to their answers and include a strong, relevant call-to-action. |
Building your quiz around these four pillars ensures a logical and compelling user experience from start to finish.
Designing Strategic Questions and Scoring Logic
The actual questions you ask will make or break your quiz. Steer clear of generic or overly technical jargon. Your goal is to get inside the user's head, so focus on their pain points, goals, and current challenges. The tone should feel like a friendly consultation, not an interrogation.
For instance, instead of the blunt, "What is your annual marketing budget?", try a multiple-choice question like, "Which best describes your monthly investment in marketing tools?". It feels less intrusive and is much easier for someone to answer quickly.
The scoring logic is the hidden engine that connects their answers to a meaningful outcome. A simple points-based system is often the best way to start. Each answer option gets assigned a point value, and the user's total score determines which result or segment they land in.
For a B2B agency, a practical scoring breakdown might look like this:
- 0-10 Points: Beginner Segment (These folks need educational content)
- 11-20 Points: Intermediate Segment (Perfect candidates for a targeted case study)
- 21-30 Points: Advanced Segment (High-intent leads ready for a sales call)
This kind of segmentation is what turns a fun quiz into a serious business tool. Once you have this strategic blueprint sorted, the actual coding in HTML, CSS, and JavaScript becomes a much more straightforward process. You're not just building a quiz; you're building a machine designed to achieve a specific outcome.
Laying the HTML and CSS Foundation
With our blueprint sorted, it's time to get our hands dirty and start building the actual quiz. This is where we turn the plan into a real user interface using HTML for structure and CSS for style. The aim here isn’t just to make something functional; it’s to build a clean, responsive, and semantic foundation that feels great to use on any device, from a phone to a desktop.
We'll focus on the core visual pieces: the main container holding everything together, the individual question "cards," the answer options, a progress bar, and of course, the lead capture form at the end. We'll be using semantic HTML5 to make sure our quiz is accessible and easy for search engines to understand. For the styling, we'll stick to modern CSS like Flexbox for layout, which lets us build a sleek interface without pulling in heavy frameworks.

Structuring the Main Quiz Container
Let's begin with the skeleton. We need a primary container to house all the different "screens" of our quiz—the welcome screen, the questions themselves, and the final results/form screen. Using proper semantic tags like <main> and <section> isn't just for show; it's a massive win for accessibility.
<main id="quiz-container">
    <!-- Start Screen -->
    <section id="start-screen" class="quiz-step active">
        <h1>What's Your Marketing Superpower?</h1>
        <p>Answer a few questions to discover your unique strength.</p>
        <button id="start-btn">Start Quiz</button>
    </section>

    <!-- Quiz Screen (Questions will be injected here) -->
    <section id="quiz-screen" class="quiz-step">
        <div id="progress-bar-container">
            <div id="progress-bar"></div>
        </div>
        <div id="question-container">
            <!-- Dynamic question content goes here -->
        </div>
        <button id="next-btn">Next Question</button>
    </section>

    <!-- Lead Capture Screen -->
    <section id="result-screen" class="quiz-step">
        <h2>Your Results Are Ready!</h2>
        <p>Enter your details below to see your personalised results.</p>
        <form id="lead-form">
            <input type="email" placeholder="Enter your email" required>
            <button type="submit">Get My Results</button>
        </form>
    </section>
</main>
You can see how each major part of the quiz is a <section> with its own ID and a shared quiz-step class. This simple setup will make it a breeze for our JavaScript to toggle the right section into view as the user moves through the quiz.
Designing Question Cards and Answer Options
How the questions and answers look is where you either hook the user or lose them. The markup needs to be clean and easy for our JavaScript to work with. A simple div for the question text and an unordered list for the answers, using radio buttons for the selection logic, is an effective approach.
Here’s what the HTML for a single question card looks like:
<h2 class="question-text">Which platform is your biggest challenge?</h2>
<ul class="answer-options">
    <li>
        <input type="radio" id="option1" name="answer" value="a">
        <label for="option1">LinkedIn</label>
    </li>
    <li>
        <input type="radio" id="option2" name="answer" value="b">
        <label for="option2">Facebook Ads</label>
    </li>
    <li>
        <input type="radio" id="option3" name="answer" value="c">
        <label for="option3">SEO & Content</label>
    </li>
</ul>
This structure is highly accessible because the <label> is explicitly tied to its <input> with the for attribute. This is a small detail that makes a huge difference—it means a user can click the whole text label, not just that tiny radio button, to make a choice.
Styling with Responsive CSS
Now for the visual polish. Our CSS will centre the quiz on the page, style the buttons to create clear calls-to-action, and use Flexbox to make sure everything lines up nicely. We're going for a modern, clean aesthetic that keeps the user focused.
:root {
    --primary-color: #00c27a;
    --light-gray: #f0f0f0;
}

#quiz-container {
    max-width: 600px;
    margin: 2rem auto;
    padding: 2rem;
    background: white;
    box-shadow: 0 4px 15px rgba(0,0,0,0.1);
    border-radius: 8px;
}

.quiz-step {
    display: none; /* Hide all steps by default */
}

.quiz-step.active {
    display: block; /* Show only the active step */
}

.answer-options {
    list-style: none;
    padding: 0;
}

.answer-options li label {
    display: block;
    padding: 1rem;
    border: 1px solid var(--light-gray);
    margin-bottom: 0.5rem;
    border-radius: 4px;
    cursor: pointer;
    transition: background-color 0.2s;
}

.answer-options li label:hover {
    background-color: var(--light-gray);
}

input[type="radio"]:checked + label {
    background-color: var(--primary-color);
    color: white;
    border-color: var(--primary-color);
}
Pro Tip: Hide the actual radio buttons (
input[type="radio"] { display: none; }) and style the<label>itself. This gives you total creative freedom over the look and feel of your answer options, letting you create a much slicker, button-like experience that people love to click.
This CSS provides a solid starting point. The .active class is the key that our JavaScript will use to create that smooth, step-by-step flow. With this HTML and CSS in place, we've got a visually sharp and structurally solid quiz, all ready to be brought to life with some interactive logic.
100% Free Lead Magnet Audit
Our AI analyzes your website and delivers custom growth strategies in seconds.
Bringing Your Quiz to Life with JavaScript
So far, we've got a quiz that looks the part, but it’s just a static page. The HTML gives it structure, and CSS makes it look good, but nothing actually happens. This is where JavaScript comes in to do the heavy lifting.
JavaScript is the engine under the hood. It’s what will handle clicks, track scores, and turn our simple webpage into a genuinely interactive experience. This is where we wire up the logic and make our quiz actually work.
First, it is best practice to keep content separate from code. It might be tempting to hardcode questions directly into your HTML file, but this can cause maintenance issues. A cleaner, more manageable approach is to define all your questions, answers, and their values inside a JavaScript array.
This simple move keeps your content separate from your code. Need to add a new question or tweak an answer? You just edit the JavaScript array, without ever touching the HTML. It makes maintenance a breeze.
Structuring Your Quiz Data in a JavaScript Object
Think of this JavaScript object as the brain of your quiz. It holds every piece of information needed to show the questions and, crucially, to calculate the final score. Each question becomes an object containing the question text and an array of possible answers.
Here’s a practical example of what that looks like:
const quizData = [
    {
        question: "Which platform is your biggest challenge?",
        answers: [
            { text: "LinkedIn", points: 5 },
            { text: "Facebook Ads", points: 10 },
            { text: "SEO & Content", points: 15 }
        ]
    },
    {
        question: "How would you describe your current lead quality?",
        answers: [
            { text: "Low, we get lots of unqualified leads", points: 5 },
            { text: "Inconsistent, it's hit or miss", points: 10 },
            { text: "High, but we need more volume", points: 15 }
        ]
    }
    // Add more questions here...
];
See how we’ve assigned a points value to each answer? That’s the foundation for our scoring logic. This simple setup is surprisingly powerful and works for most lead generation quizzes. If you're planning something more complex, we take a deeper dive into question formats in our guide on building a multiple choice quiz.
Dynamically Rendering Questions and Answers
With our data neatly organised, we can now write a function that dynamically displays the current question. This function will grab the right question object from our quizData array and inject its contents into the HTML elements we built earlier.
JavaScript gives us all the tools we need to manipulate the page and create these kinds of interactive experiences. This screenshot from the MDN Web Docs shows just how vast its ecosystem is.
The documentation is full of built-in methods for selecting elements, listening for user actions, and updating content on the fly—all things we're about to do.
Our rendering function will have a few simple jobs:
- Grab the
question-containerandanswer-optionselements. - Wipe out any content from the previous question.
- Populate the question text.
- Loop through the answers, creating an
<li>element with a radio button and label for each one. - Add these new elements to the page.
This approach makes the whole quiz modular and scalable. To add another question, you just add a new object to the quizData array. The rendering logic takes care of the rest automatically.
Building the Scoring Engine and Handling Navigation
Now, questions are showing up. The next piece of the puzzle is making the "Next" button do something useful. We need to attach an event listener to it that triggers a few key actions when clicked.
When a user clicks "Next," the script needs to figure out which answer they selected and add its point value to a running score total. Then, it has to advance to the next question in our quizData array. If they’re on the last question, it should hide the quiz container and show the lead capture form instead.
The core logic is a simple loop: display question, wait for user input, record the score, and advance to the next question. This cycle repeats until the quiz is complete, creating a seamless and guided flow for the user.
This process turns a static form into an interactive dialogue. While old-school media quizzes are fun, digital quizzes unlock huge potential for data capture and personalisation. Data on the mobile trivia game market shows just how engaged users are with these formats, and this engagement pattern can be leveraged for marketing.
Finally, we need to add some basic validation to our lead capture form. Using the required attribute on the email input field in our HTML is a simple but effective first line of defence. For something more robust, a small JavaScript function can check if the input looks like a valid email format before letting the form submit. This one small step helps ensure you collect clean, usable data from every lead.
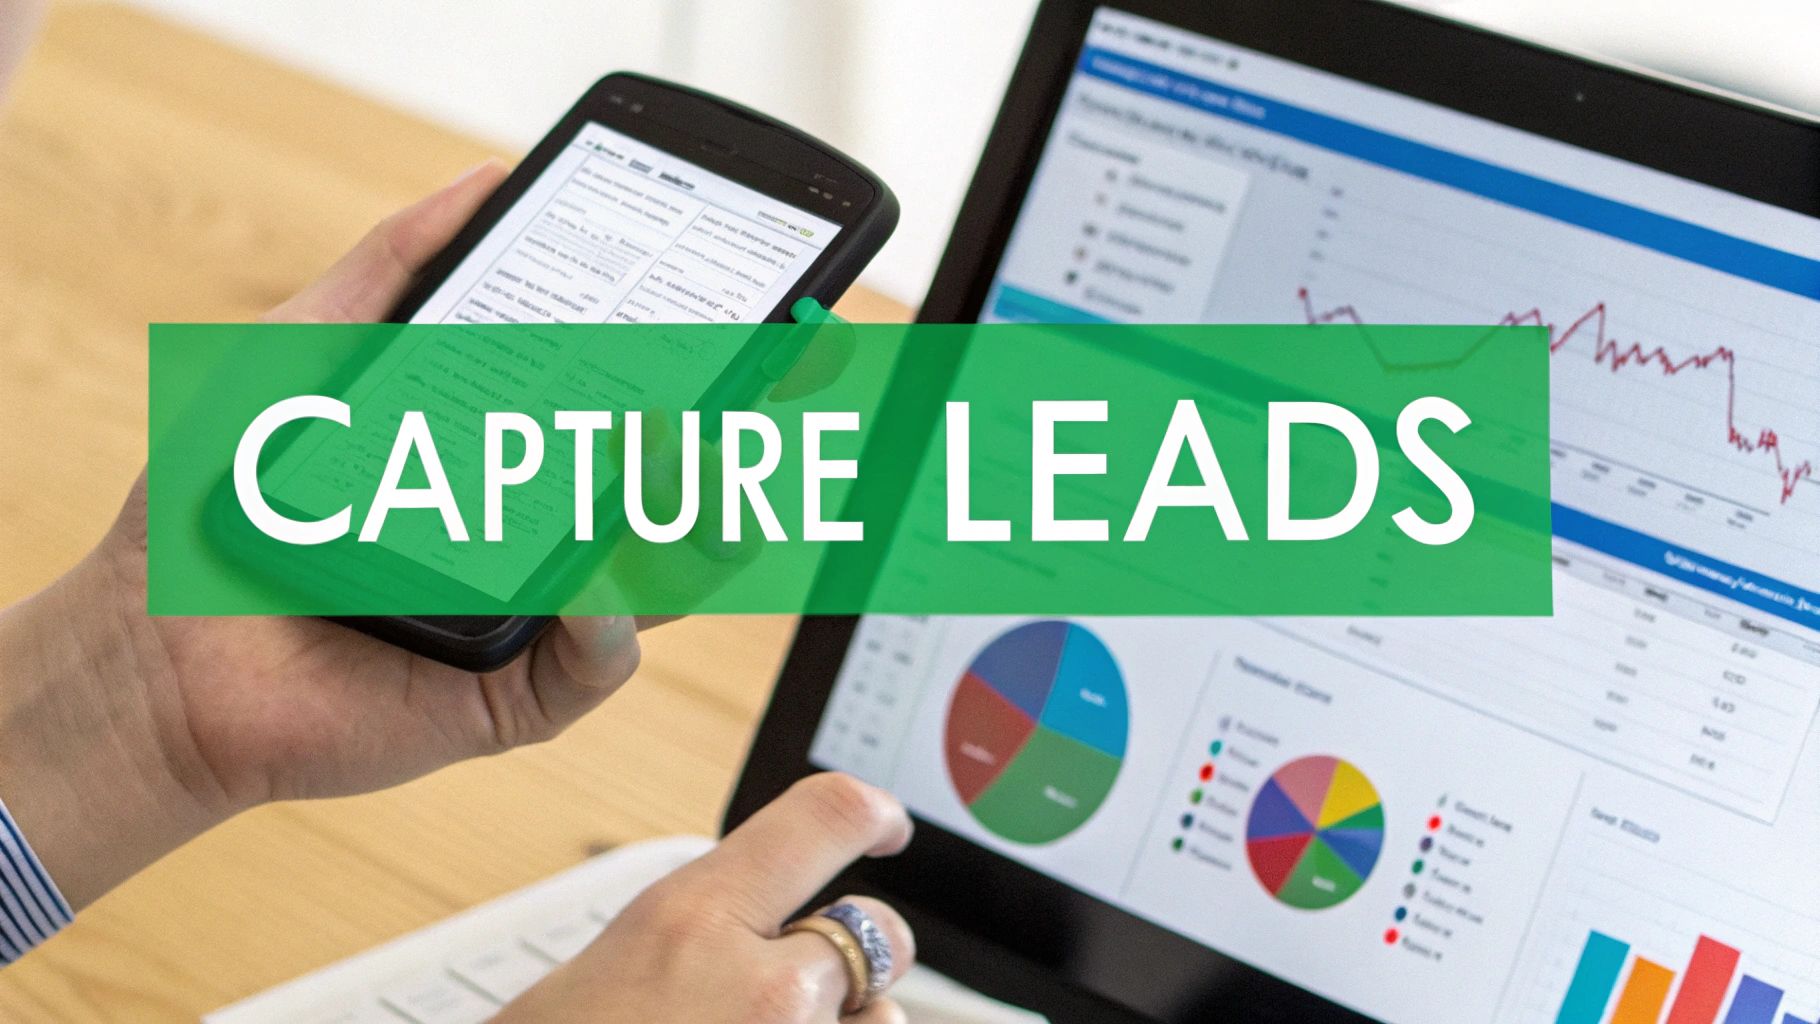
Capturing and Using Your Quiz Data
A quiz that doesn't capture data is a missed opportunity. Building the quiz is half the battle; the real magic happens when you connect the dots. The final, crucial step is making sure all that valuable information—the lead's contact details, their answers, and their final segment—actually makes it into your marketing stack.
This is where your quiz goes from being a fun piece of content to a serious data collection engine.
The goal is simple: get the data from the user's browser to your CRM or email platform without a clunky page refresh. To do that, we'll handle the form submission asynchronously using JavaScript's Fetch API. It keeps the user experience smooth and seamless.
Submitting Quiz Data Asynchronously
When the user hits "submit" on your lead form, the first thing we'll do is tell the browser, "Hold on, don't do your usual thing." We'll prevent the default form submission.
Instead, we'll neatly package up the user's email, their final score, and the segment they were assigned into a clean JavaScript object. This little bundle of data, often called a payload, is what we send off to our backend.
This payload is the goldmine. It doesn't just tell you who the lead is; it gives you the context of what they need, based on their own answers.
Structuring the Data Payload
A well-structured payload is your best friend. It makes it dead simple for other systems to understand and use the data you're sending. Your data object needs to be clear and descriptive so you can easily map the fields to your CRM or marketing automation platform.
Here’s a practical example of what that payload could look like:
const leadData = {
  email: 'newlead@example.com',
  quizScore: 25,
  segment: 'Advanced User',
  answers: [
    { question: 'Biggest challenge?', answer: 'SEO & Content' },
    { question: 'Lead quality?', answer: 'High, but we need more volume' }
  ]
};
This data is highly useful. You capture the final outcome (segment) but also the specific answers that got them there. This is zero-party data at its finest, and it’s the key to creating genuinely personalised follow-up campaigns.
Once the data is organised, the Fetch API sends it on its way to a URL endpoint you specify. This could be a custom endpoint on your own server or a webhook URL from a service like Zapier, which can then push the data to pretty much anywhere you want.
The real power of a custom quiz is unlocked when its data flows seamlessly into your marketing tools. This connection turns a one-time interaction into the beginning of a tailored, automated customer journey.
If you want a simple way to get started without a complex backend, look into automating data from forms to Google Sheets. It can act as a lightweight database or a bridge to other tools.
Powering Personalised Follow-up
Once that data lands in your system, the real fun begins. Now you can trigger automated workflows based on the quiz results.
Here’s a practical example of how you could act on the data:
- 'Beginner' Segment: Automatically enrol them in an educational email nurture sequence that covers the basics.
- 'Advanced User' Segment: Create a task in your CRM for a sales rep to reach out personally. They're a high-intent lead.
- Specific Answers: If a user said their biggest challenge was "SEO," you could send them a case study on how you helped another client triple their organic traffic.
This is how you turn a simple quiz into a sophisticated lead generation and nurturing machine. For a deeper dive on connecting these systems, our guide on marketing automation and CRM integration has more strategies.
The enduring popularity of quiz shows points to a fundamental human interest in a question-and-answer format—something you can easily translate into digital marketing success.
Got Questions About Building an HTML Quiz?
As you move from a rough sketch to a live, interactive experience, some practical questions always pop up. Building a custom quiz might feel like a big project, but most of the common hurdles are easier to clear than you think. Let's cover some of the most frequent ones.
One of the first big forks in the road is deciding whether to build from scratch or just grab an off-the-shelf tool. This choice really boils down to one thing: control versus convenience.
Custom Build or SaaS Tool: Which One’s Right for You?
Picking between a custom-coded HTML quiz and a third-party SaaS platform is a classic trade-off between flexibility, cost, and how fast you need to get it done.
A custom build gives you 100% control over the user experience, branding, and how your data flows. You own the code, and you’re never boxed in by a platform's feature list or pricing tiers. It's your asset, through and through.
The flip side? A SaaS solution gets you to market way faster. If you're weighing your options, it's worth taking some time to explore various online quiz maker tools to see what's out there. These platforms handle all the messy stuff—hosting, backend logic, integrations—which can be a massive time-saver. The catch is you're usually looking at a recurring subscription fee and less say over the tiny details of the design and data management.
To make this a bit clearer, here’s a quick head-to-head comparison.
Custom Build vs. SaaS Quiz Tool: A Quick Comparison
Deciding which path to take often comes down to your team's resources and long-term goals. This table should help you see the trade-offs at a glance.
| Factor | Custom HTML Quiz | SaaS Quiz Tool |
|---|---|---|
| Control & Branding | Total control over every pixel and user interaction. | Limited by the platform's templates and settings. |
| Data Ownership | You own and control 100% of the data and its flow. | Data is stored on a third-party platform. |
| Upfront Cost | Higher initial investment in development time/resources. | Low or no upfront cost; subscription-based. |
| Maintenance | Your team is responsible for all updates and bug fixes. | The provider handles all maintenance and updates. |
| Speed to Launch | Slower; requires planning, coding, and testing. | Very fast; can build and launch a quiz in hours. |
So, what's the verdict? If you need maximum flexibility and you're planning to make this quiz a core part of your marketing machine for years to come, a custom build is almost always worth the investment.
How Do I Actually Measure the ROI of My Quiz?
Measuring the return on your quiz isn't just about counting leads. That's a vanity metric. To get a real picture of its value, you need to follow a few key metrics all the way down your funnel.
Start by obsessing over these core numbers:
- Completion Rate: What percentage of people who start your quiz actually finish it? A big drop-off rate is a huge red flag—it could mean your questions are too long, too boring, or just plain confusing.
- Lead Conversion Rate: Of the people who finish, how many fill out your lead form? This number tells you how compelling your offer is right at that moment of truth.
- Lead-to-Customer Rate: This is the money metric. What percentage of the leads from your quiz eventually become paying customers?
- Value per Lead: Once you can track revenue from quiz-generated customers, you can work backwards to assign a real monetary value to every single lead the quiz brings in.
The trick is to connect your quiz data directly to your CRM. This is what lets you follow the journey from a simple quiz answer to a closed sale. It’s how you prove the quiz’s ROI in cold, hard cash.
Can I Make My Quiz Responsive Without a Framework?
Absolutely. And honestly, you probably should. While frameworks like Bootstrap or Tailwind can get you moving quickly, you definitely don't need them to build a perfectly responsive quiz. Modern CSS has all the tools you need right out of the box.
A simple combination of a fluid container (max-width with a percentage), Flexbox for layout, and a few media queries for key breakpoints is more than enough to get the job done right. For instance, you can use a media query to stack your answer buttons vertically and bump up the font size on smaller screens. It’s a simple fix that guarantees a great mobile experience without the code bloat of a full framework.
A mobile-first CSS approach is your best friend here. Design for the smallest screen first, then use
min-widthmedia queries to add complexity for larger screens. This method naturally leads to cleaner, more efficient code and a better mobile experience.